Two days ago me and the other members of the group were set a photography task, of having to take picture of objects that create letters. We were set this task to help us develop are awareness and vision, as you need these traits when looking for the letters, and more importantly need these traits in photography as a whole. We were allowed to work in pairs for this task. I worked with Jake Fisher. Together we walked around the streets of Bournemouth and around the university campus to find everyday objects that on closer inspection create letters. Below is the letters that we have so far.
(A)
(B)
(C)
(D)
(E)
(F)
(H)
(I)
(L)
(M)
(N)
(O)
(P)
(R)
(S)
(T)
(V)
(W)
(X)
(Y)
As you can see, we have not yet completed the alphabet, although we believe that we will complete it by the end of the week. We are reasonably happy with some of the letters that we have been able to find, however we have found that finding letters such as G, Q and J is incredibly difficult.
We both do intend to use this images within our work. We firstly want to use the images to create a typography of our names, that we can then put into both our blogs and portfolio websites. We have also discussed the idea of using the images as a website plug in, which would allow people to write a word/phase in to a form and the website would generate the word/phase out of the alphabet images. We feel that this would be a good effective way of using these images, and also displays a good amount of skill.
Today we have been given a brief of having to create the alphabet out of pictures which on closer inspection create letters. However this is just a starter task to get our imaginations working as we have also been introduced to a photography technique of panoramic images.
"Panoramic photography is a technique of photography....that captures images with elongated fields of view. It is sometimes known as wide format photography."
Panoramic images work by stitching a number of different images together, which makes the image look as though it is one large picture. Recently this photography technique has become increasingly popular, due to the introduction of the feature to most smartphones. This has allowed more people, that perhaps have limited skill in photography, to create some incredible pictures.
Although the panoramic feature in most smartphones does the job of created panoramic images very well, there are methods which allow for even better panoramic images to be created. One of these methods is through using a piece of open source software called Hugin. This piece of software allows the user to input a number of pictures of a scene (these pictures should ideally be taken on tripod and have at least 10% of the previous image within them) and then the software will find points in which they are similar and switch them together.
Hugin is incredibly useful because unlike the panoramic feature on a phone, it allows for 360 horizontal images to be made. This is an incredibly useful feature because if implemented with a plugin within a browser then this could be used as an immersive user experience.
Using Hugin, I will be soon creating some panoramic images, which will then be present in my portfolio.
Having been set animation tasks over the past number of weeks, I have decided that I am going to not continue and develop my ideas. I have decided that I am not going to continue and develop my skills with animation and flash for a number of reasons. One of those reasons is because I feel that I already have a good understanding of Adobe Flash and therefore do not feel that my best interests would be served in continually doing the same thing in a piece of software which I am already comfortable with.
I am also not going to carry on using Flash because as Steven, J says Flash is a dying piece of software because since the introduction of HTML5 people simply have needed to use Flash. This is because basic animation can simply done through HTML5 and CSS3, so this has essentially cut out the middle man in the past which in this case is Flash. This means that theoretically the only reason to use Adobe Flash is to create basic 2D animations, and that is something that I am already comfortable with. (Steven,J 2011)
While I am not saying that I am not going to seek to improve my animation skills further, I am saying that I will not be doing any more on Flash. However despite the fact that I will not be carrying on with Flash, I do believe that I have gained something from the Flash brief, which is that due to the fact that we were working with such as small frame, it made me think of what could be accomplished in the space. I also enjoyed the introduction to sound production, despite the fact that what sound track I produced was not overly good, I may continue with sound production and implement it into other pieces of work in the future.
Overall found this project very interesting, due to the fact that it tought us the principles and the origins of animation. However I did also find this project very easy, and did not find it a challenge to be able to create a working spinoscope because it is something that I had done previously. Although when I had done it before, I had not hand drawn the frames, and for some reason I felt that the hand drawing the frames did give me a greater understanding of how animation in principle does work and how hard it is to truly master.
However I am unlikely to continue this type of project in the future as I feel that as far as simple spinoscopes I have already achieved all that I can achieve from it. This is because due to my limited drawing ability I will not be able to create more complicated hand drawn ones, and if I were to do it on the computer, with software such as Flash, it is very unlikely that I would be produce a simple spinoscope. I also feel that even if I were to attempt to create hand drawn spinoscopes, then the likely hood is that the amount of time that I would put into making a more complicated one would not really be sufficient to the amount of effort that has been put in.
Along with being given Flash animation to do, we were also tasked with the project of having to create a simple 12 frame spinoscope animation. Due to the lack of frames that I would be able to use I ensured that I would do something simple, such as the moving horse, as seen below.
I decided that as this would be very a simple animation, I would hand-draw the frames, because that is how traditionally animation would be done. I also felt me hand drawing each frame would in a way improve my understanding of animation, and how subtle changes each frame changes creates an animation effect.
I did have many ideas for this, such as ball bouncing up and down and a person walking, however the idea that I cam up with was a simple colour changing in different circles, each frame. I chose this idea because I felt that it did met the brief perfectly of a simple 12 frame spinoscope, which does show an understanding of animation.
Above is my, finished spinoscope. I am happy with how it turned out, mainly because it does met the brief of having to be a simple 12 frame, animation. I am also happy because this could easily be placed on a loop and there should be no indication when it starts and when it ends, and in my view for something as simple as this, that is an important feature.
In the past few days I have been a set a new brief of having to make to number of different multimedia works, that will be placed within my portfolio. The first of these pieces of work was to create at least one piece of animation, in Adobe Flash, that lasted 15 seconds. There was also the stipulation that the canvas size could only be 22mm x 18mm. This size was set by the lecturers as to limit the amount that we could do and provide us the challenge of having to work with set limits. We also had to add a sound track to the animation. This sound track would be created using Garage Band.
Below is my animation which I created. I call it flying balls. The idea is that a number of balls will fly around the canvas, and when they hit a side of the canvas or each other, the background and each ball will change colour. This I felt added another dimension to the animation and made it more exciting than just an number of balls flying around. I also designed it so that you would struggle to see when it ends and starts to re-loop. I did this because I felt that for these type of short animations that if they are going to continually loop, then they should loop in some continuous way.
I believe that there are aspects of this animation that I could improve, such as the music. I like that the music is upbeat, however I do not think that it matches the animation overly, well. I also feel that I could add some sound effects when the balls hit each other or hit the walls.
Today I have been set the mini task of creating a 15 second animation with a sound track using Adobe Flash and Garageband. They stated that they were looking for a piece of clever abstract animation art and that the size of the canvas should not exceed 22mm by 16mm. I believe that the overall idea of the task is to improve our knowledge of animation and too make us aware of how we use our canvas area, because in the project we do not have a large canvas to work with, meaning that we are going to have to be clever with how we use the area.
I am looking forward to this brief, because it will allow me to try something which I have not done before, which his music production. Unlike the use of Adobe Flash, I have absolutely no experience in music production and have never heard of Garageband. So I am looking forward to trying a new piece of software and increasing my skill set. However I am not overly looking forward to having to use Adobe Flash, as this is a piece of software which I have used for many years and is a piece of software which I am comfortable using and I do not believe I will gain much experience into animation through this brief because I will be doing something which I have already done.
In this post I will be looking back at some of the key points and milestones in the history of animation. First of all, the term animation has origins from the word anima which does essentially mean to "to breath life into. This is obviously a very apt word for the act because animation is fundamentally creating the illusion of something that is not real as having life.
Many people believe that the origins of animation started in the 17th century with the creation of the magic lantern (see image below). Many people believe that this device was the origins of animation as the contraption had the ability to be able to project images on to surface through using a light source. Obviously at the time which the device was created the only artificial light that was available was through lanterns, therefore the images which were project were very dim. This can be seen as the origins of animation because of the use of a slider, which when pulled over the front of the lens would project different images. (Prafgner 1974)
The next major milestone comes in 1824, when an examiner of physiology, Peter Mark Roget explained the idea of 'Persistence of vision' He sated that an image is retained on the retina of the eye until replaced by a new one, and when the images come very quickly then it creates the simulation of motion. This is a very important step in the history of animation because what Roget stated here is the fundamental principle of not just animation but all of motion picture. Because essentially all motion picture is a number of slightly different frames shown to the viewer very quickly and it creates the illusion of movement.
Not long after Roget explained the idea of 'persistence of vision' George Horner created the Zoetrope in 1829. This creation perfectly showed the persistence of vision, due to the fact that the Zoetrope was a contraption which had a number of images on the inside and a hole on the outside. When the contraption is spun and the user looks through the hole they briefly see each image, however due to the persistence of vision it creates the illusion of motion.
The next milestone in the history of animation came in 1879 when a British photographer created the Zoopraxiscope. This followed the same principle of the Zoetrope, however it allowed form more sophisticated images to be shown. What he did was set a number of cameras and took pictures as a horse ran past. When he then put the images from each camera it create the illusion of movement, which can be seen below.
The idea of the Zoopraxiscope is still used today. Metro Vista use the idea in subways. They install up to 200 boxes which each have an image and a motion detector senses an approaching train, and send out a command that sequentially illuminates each box for a split second. This creates the effect to the person looking at the images the same as watching a motion picture.
However going back to the history of animation, the next major milestone happened in 1896 when Thomas Edison created the first motion projector. This allowed for many frames to be shown in quick succession. This essentially was the creation of all major motion pictures, because more frames could be shown and for longer. This was the case as ten years later James Stuart Blackton created the first animated motion picture, using a chalkboard. This video can be seen below.
After this a prominent figure in the history of animation emerged. His name was Winsor McCay. His first animation was when his popular newspaper character was turned into an animation in 1912. This was soon followed by him creating another animation called "Gertie the dinosaur" being created out of over 10,000 individual pictures. Then 1918, he created one of his most prominent pieces, which was called the "Sinking of the Louisiana". This was the first time that animation had been used to re-create a real story.
During the same time as Winsor McCay was creating a number of prominent animations, Ma Fleischer created the rotoscope in 1917. This was a device that was used for tracing frames from live action film. What this meant is that animators would now have a much easier time when drawing their individual frames, because they would be able to trace parts from the previous frames.
One of the next most pivotal moments was when Otto Messemer created Felix the cat. This is considered by many to be the truly first animated character and would later be the inspiration for Disney. As in 1923 Disney created the first sound feature, with "Steamboat Mickey" which featured perhaps the companies most famous character Mickey Mouse. Not long after this, in 1927, Warner Brothers created "Jazz Singer". This is recognised as the first most meaningful integration of sound and action.
Through the 1920's to 1940's a number of prominent animated characters were created such as Bugs Bunny and Tom and Jerry. However it would not be until 1972 in which characters would be created for adults. Ralph Bakshi created Fritz the cat, which shunned the typical stereotype that animation was for children. This creation would help develop another type of animation which would be aimed at adults, and could in many ways be credited for the reason to why shows such as Family Guy and the Simpsons are around.
For me it is not until 1982 when Disney created Tron, using computer animation, where the next major development in animation happened. This is because this introduced the idea of computer animation to the masses and as seen in todays animations, meant the beginning of the end for hand drawn animation. The idea of computer animation has defiantly caught on because in 2010 3D computer animation was introduced, with films such as Avatar and UP using these techniques.
Having recently completed the team channel assessment, I feel that it would be wise to look back at the work that has been completed and the way in which me and the other members of the team worked within the project. This will beneficial as I will be able to see areas I can improve in and what parts we did well as a team so that they can be replicated or improved for future tasks like this.
One area of our team work that I felt went well is the fact that within the first meeting we had organised our rolls quite clearly within the team. This meant that there was no confusion within the team at who was responsible for what and beneficial to the individual as each person would know what area of the project they would be responsible for. Along with another area of our team work that went well and aided in us begin able to work efficiently was the fact that the communication within the team was very good and constant. This meant that as a team we were able to easily organise team meetings and ensure that everyone within the group knew what stage the project was at. This communication was also vital due to the fact that it allowed members of the group to inform the others where they were in there specific tasks, which meant that if they had fallen behind then there would be no last minute rush, as everyone already knew and a solution would have been made.
Although I believe that some of our team work within the project was generally good there was some aspects that of our performance that affected the overall quality of the finished product. One of these aspects was our naivety. Although this should improve as we become more experienced, the fact that we were naive and did not really begin to plan how we would create the videos, meant that we was not able to complete the six videos as we had previously planned. This naivety also affected the finished videos because we did not really get as much footage as we would have liked for each video, meaning that instead of having four videos of at least 1 minute long, we had four videos that had an average viewing time of 40 seconds. Therefore this is something that could be improved in the future assessments such as this, by ensuring that a clear plan for each video is created and we know before we begin filming what exactly we will be filming and what we will actually need to film with. I say that we have a clear plan of what we need to film with, because within the filming of the videos we had forgot to order two tie clip microphones. meaning that each scene had to be shot twice with each actor wearing it, so that we could get audio quality.
Another aspect that I would improve is a personal improvement. This improvement is that I would not leave making the website for any project so late in the future. Although this is not entirely my fault, as I was waiting for the designs of the website from the person in charge of graphics, I should have tried to push them along to get the designs quicker. This is because in not pushing the person to get me the designs earlier, meant I had much less time than what I would have liked to create the website, which put me under pressure and ultimately meant that the finished product that I produced was of a lower standard than what I would have liked. In future projects I will ensure that if my part in the project is reliant on other people then I will try and get them to do there part quicker.
However despite there being some negatives to our performance I believe that the project has been a success and many lessons can be learned from it. I especially found the entire film production, which is something that I had not done before, was a good experience can gave me a good insight in video and audio production. Along with that I have also been able to improve my HTML5 and CSS skills in using a techniques when creating the website.
Today marked the end of the team channel brief that we had been presented with, me and the other members of the group presenting the finished product. The presentation had to be a minimum of ten minutes long which we complied with easily. Within the presentation we as a group discussed the stages in which we went through to get the finished product. We discussed how we had come up with our brand and our logo, how the video ideas had changed from being a purely comedy type videos to becoming more serious. Within the presentations we also described our roles within the team which where:
Production manager - Jade Garstang
Scriptwriter - Callum Sulsh
Graphics - Oliver Evans
Programmer - Liam Gorton
Editor - Jake Fisher
Camera and audio - Josh Hawes
When presenting the finished channel that we had created we showed the four videos that we had made and the website that had been created (These can been seen below). When showing this there was some problems. One of the problems that we faced is that the website was out of alignment due to the fact that it was not coded to change for the size that we where displaying it meaning that parts of the website such as the tab bar were out of place. This problem was dealt with, along with another problem which was that one of the videos was not exporting correctly, meaning that they were being displayed in a very low quality compared to the others. However despite these few mistakes, the feedback and the way the videos were received was largely positive and the only negative feedback that we received was feedback that we knew we would get and problems that we resolved before the hand in.
(Hoverboard video)
(Teleporting video)
(Time travel video)
(Portal video)
Website Screen shots
(Home page)
(News Page)
The above two images are screenshots from the webpage. From the screenshots you can see that a very simple layout and colour scheme has been used within the website. This is because we felt that if we kept the design simple then people's eyes would be drawn to the changing background, which we felt would be the one design feature that would help elevate the website in terms of look. Along with that the colour scheme was set as mainly white because we felt that the colour in its plainness completed the images in the background that are mainly quite dark.
When designing the website I also felt that there would be need for a footer, that can be seen in the first screenshot. I felt that this was needed because typically on most websites this is where people would go to find information such as contact details. Therefore as can be seen in the first screen shot I have incorporated a footer with different communication logos so that people would easily be able to contact us if needed.
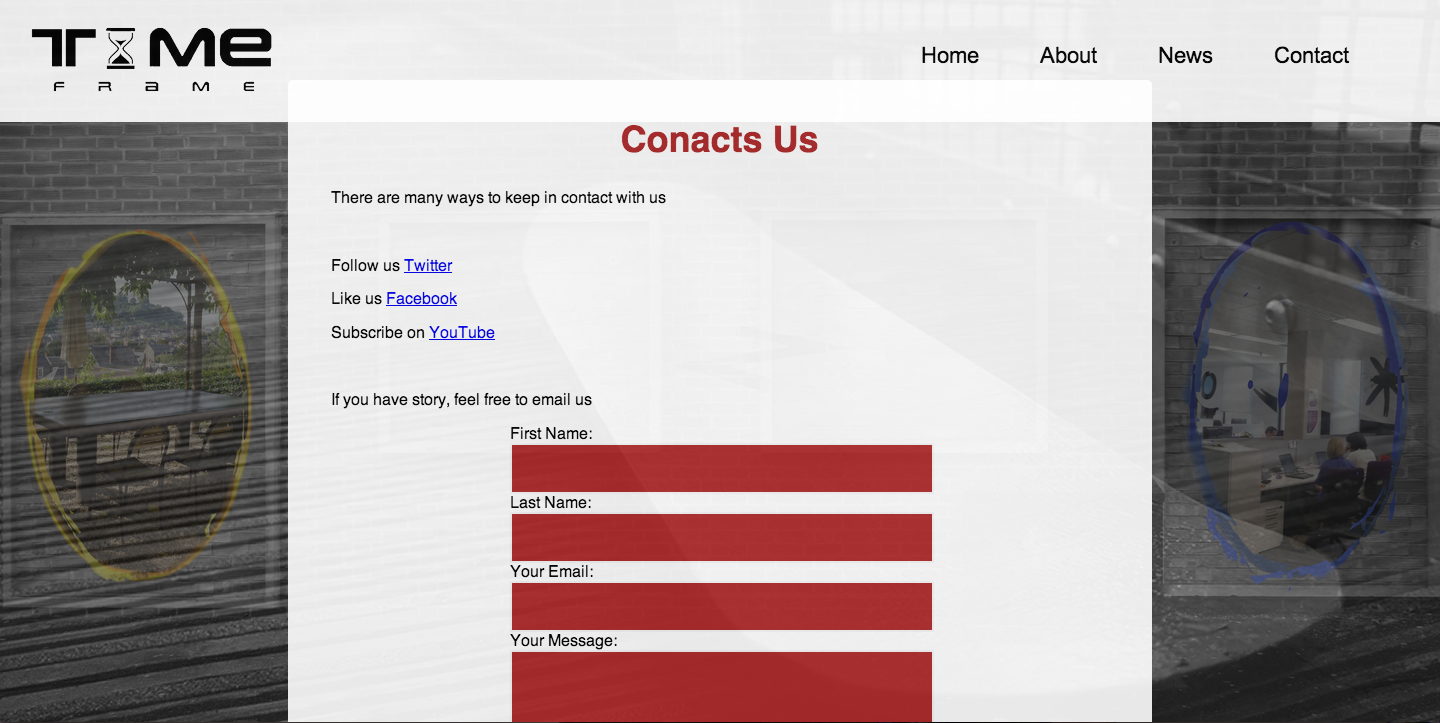
Below is a screen shot of the contact page. This page admittedly was designed in a rush therefore it in my view does not look as good as the rest of the webpage. However despite that fact the page does serve its purpose, in that it has links to forms of social media that our brand is located on. Along with that it also has an email, which is created with PHP, that allows users to send in news stories if they have some.
(Contact Page)
Ultimately I am happy with the way that the website turned out and functions, and the way in which the videos turn out as well. However I do think that there are areas which could have been improved.
Today we have finished filming in the green screen studio. We have been using this facility due to the fact that using the green screen capability would allow us to create the illusion of a news studio very easily within the videos. The green screen capability would also allow aid in making some of the effects that will be in the videos, such as the time lapse and the portal effect.
(Picture of filming in the green screen)
While filming in the green screen room we did not really encounter any technical issues with the filming. However the filming did take longer than what was previously expected. This was down purely to the fact that we were not using actors. In hind sight it would have probably been wise to have used actors within the videos because even student actors, would have some degree of professionalism which would have meant that the filming could have gone quicker, due to the fact that filming was going slowly due to the fact that we in the videos and because most of us were nervous in front of the camera meant that the filming went slower.
We have also encountered another problem, which is not one that we could control. The problem in question is the weather. We were due to film outside tomorrow however looking at the weather report, that will not be possible. This means that filming will have to be put back another day when the weather is fine, but that means that the editors have one less day to edit the videos, which puts pressure on them.
From a meeting that we have had today, the plan for the website and the brand has been finalised. Firstly we have decided that the brand is going to called Time Frame, due to the fact that we feel that the name Time Frame, has more to do with travel. Along with that it is name that we all feel comfortable which was not something that was not present with the other names that was put forward. We have also finalised the logo (see below) for the brand . The logo we feel is very futuristic which reflects our brand image perfectly. We also liked the way that the T was designed. This is because you could take the remainder of the logo away and you would still be left with a recognisable logo. This works perfectly due to the fact that the logo has to be present in the videos to show that it is part of the brand and now that we have logo that can be reduced to just one letter means that our brand can be represented and also it does not take up as much room on the videos.
(The finalised Time Frame logo)
Within the meeting the design for the website has also been finalised. We have decided that we are going to have a changing full image photo slider background. The images will be composed of images of the forms of transport that we will be filming. We have also decided that the website will have page transitions because we feel that this will give another dimension to the website. However because we are going to have page transitions, means that the website will fundamentally be a one page website, which means that the website could take some time to load. To combat this we are going to create a gif for the loading screen, as this will show the user that the website is loading and looks a lot more professional, instead of an empty page.
.jpg)


.jpg)


.JPG)


